How to import.csv files into NetSuite is fairly simple. To import a CSV file into NetSuite, first, you need to select the file you want to import from. To import a file into NetSuite, you need to choose the source file in the Export window. Once you have selected the source file, you can use the Import Assistant to move it into the NetSuite database.
You must be logged in to NetSuite before you can import a CSV file. To import an XLSX file, you must first log in. To log in, go to Setup > Import/Export. Then, select CSV records. Once you have selected a file, select Import. If you have multiple files, you can export them.
If you need to import a CSV file, you can choose the XLSX format. This file can contain any data. For example, you can import a list of customers or sales orders. Once you have selected a file, you can click on the XLSX icon to import it. Next, you can click on Advanced Options and choose the corresponding options. For example, you can check the mandatory custom fields and ignore read-only fields. Lastly, you can start a triggered workflow to begin the process.
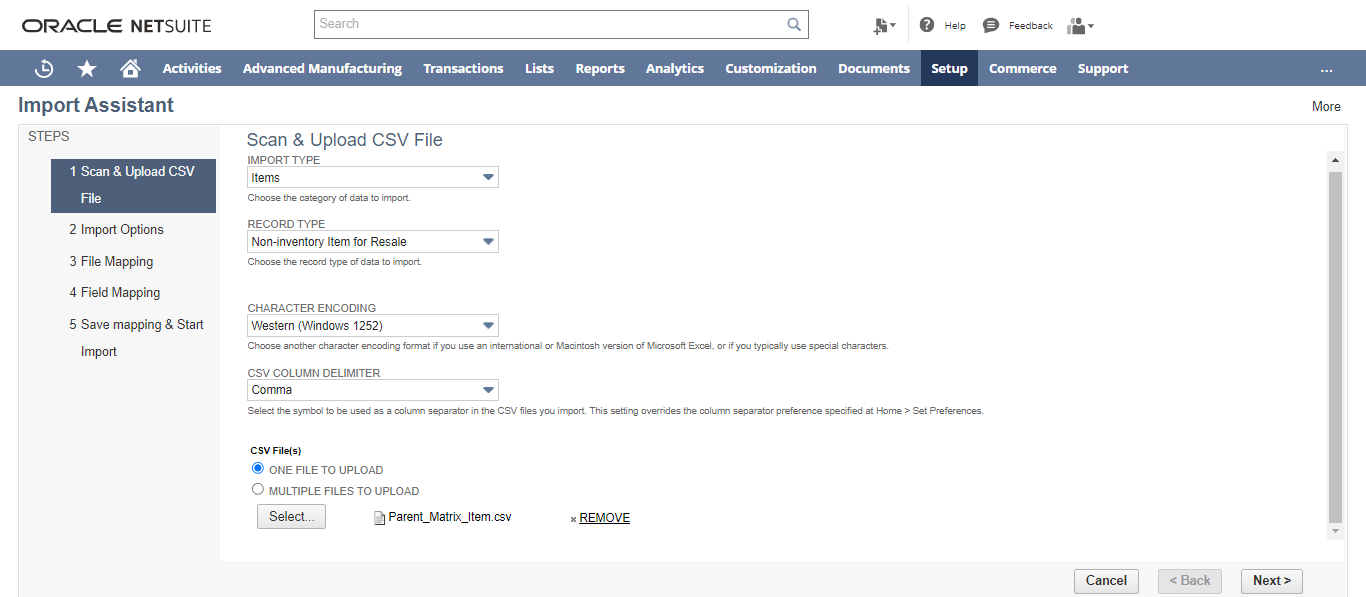
To import a CSV file, you need to first scan the file. Once you have chosen a file, click on the Upload button. The Import Wizard will now open the CSV file. In case your file is not in English, make sure to use Unicode (UTF-8) encoding. When you import a non-English CSV file, you should also check the Account-Level Character Settings and choose a decimal point.
To import a CSV file into NetSuite, you must create a separate record for each type of record in the file. This allows you to import the same data into multiple fields, but you must specify which columns to map in the CSV. This can be done with the help of the Import Assistant. When you have saved the data, you can rerun the process and delete the imported data.
You can import.csv files into NetSuite by following the steps below. In the first step, you need to scan the file with a scanner. If the file is in English, choose the “CSV” option in the Import/Export menu. After completing the scanning process, you must click on the “Import” button to import.csv files into Netsuite.
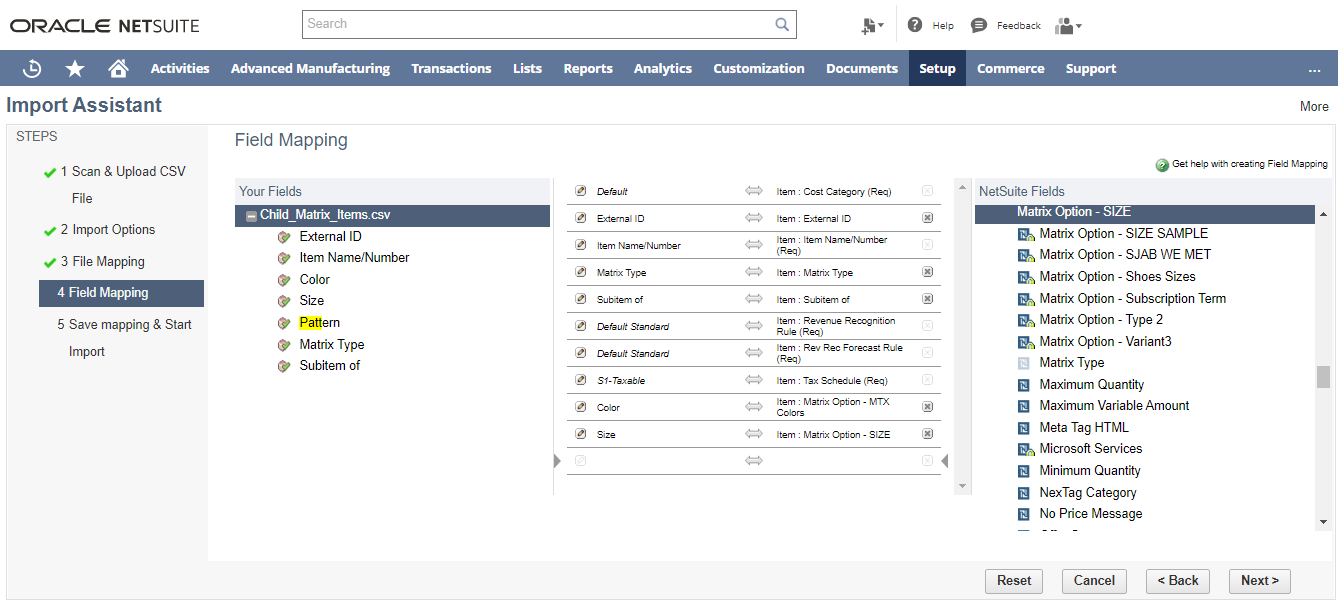
Once you have uploaded your CSV file into NetSuite, you need to map the fields in your CSV file. To do this, you must select the data you wish to import. If you don’t want to import the data, you should choose the option “CSV file import”. You can also map blank fields in NetSuite by dragging and dropping them in the Data field.
To Know more about Oracle NetSuite Cloud ERP, feel free to reach us on:
Website: https://www.saturotech.com
Saturo Website: https://www.saturotech.com/
BillMade Website: https://billmade.com/index.php/oracle-netsuite-pos/
Email ID: marketing@saturotech.com
Saturo Social Media Links:
- Facebook: https://www.facebook.com/saturotech/
- Instagram: https://www.instagram.com/saturotechnologies/
- LinkedIn: https://www.linkedin.com/company/saturo-technologies-private-limited/
- Twitter: https://twitter.com/saturotech
- YouTube: https://www.youtube.com/channel/UC69yIWnRwPV04KydM64sXTw/videos
BillMade Social Media Links:
- Facebook: https://www.facebook.com/Billmade-786831018169916/
- Instagram: https://www.instagram.com/billmadepos/
- LinkedIn: https://www.linkedin.com/company/billmade-pos/
- Twitter: https://twitter.com/saturotech
- YouTube: https://www.youtube.com/channel/UCdh1AYXBN3M4oBmxwGa7yeg/videos
To Read More of our NetSuite Blogs Visit: https://www.saturotech.com/blog/
To Read More of our BillMade Blogs Visit: https://billmade.com/index.php/blogs