Do you have vendors that require deposits before they will begin the work for you? In NetSuite making payments to vendors is happens after record the vendor bill. It is used to record the deposit amounts paid to vendors. We can use these prepayment amounts for any open bills for the respective vendor.
It is a posting transaction in NetSuite. This feature is used to record and track multiple prepayments & prepayment applications for the vendors.
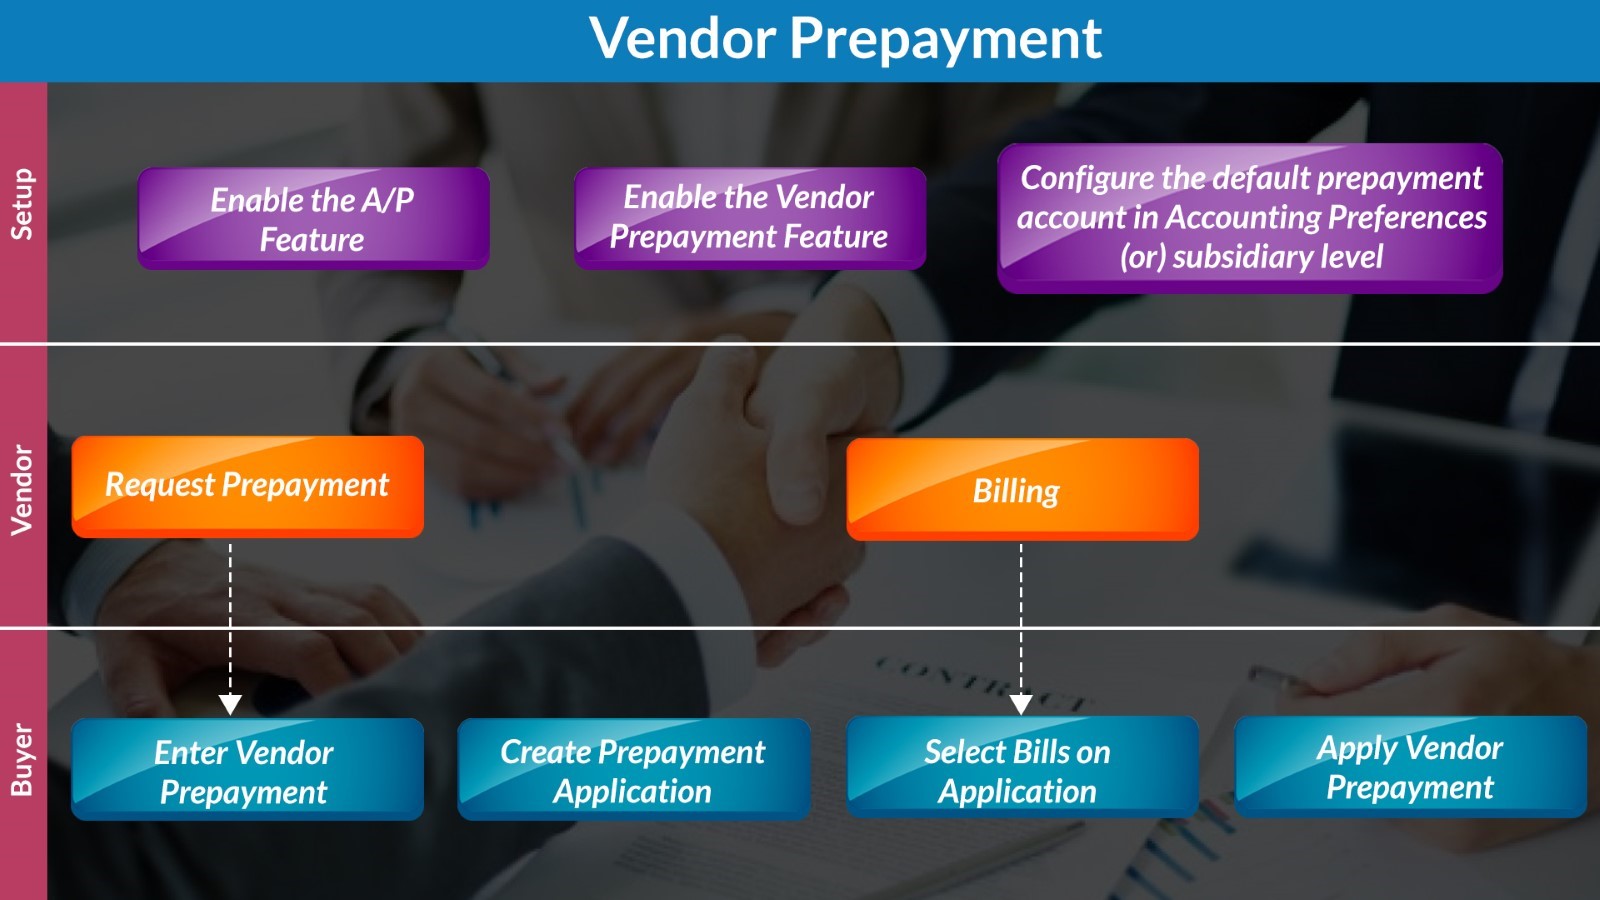
The following flow chart indicates the process of vendor prepayment.
Enabling the Vendor Prepayments Feature:
- Go to Setup > Company > Setup Tasks > Enable Features.
- Click Accounting subtab.
- In Basic Features section, verify that the A/P box is checked.
- In Advanced Features section, check the Vendor Prepayments box.
- Save.
Configure the Default Vendor Prepayments Account:
You can configure the vendor prepayment account at the company level. If you are using NetSuite One World configure the account at the subsidiary level. Account should be only as Other Current Asset types. This account NetSuite populate by default when entering a new vendor prepayment transaction.
- Default vendor prepayment account configuration at the company level:
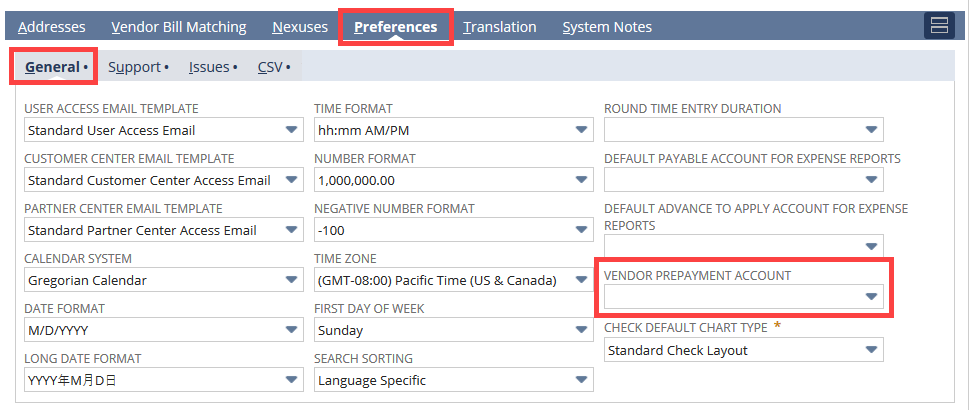
- Go to Setup > Accounting > Preferences > Accounting Preferences (Administrator).
- In Accounts Payable section, select the account from the Vendor Prepayment Account dropdown list. Default vendor prepayment account configuration at the subsidiary level:
- Go to Setup > Company > Classifications > Subsidiaries (Administrator).
- Click Edit and go to the Preferences subtab
- Click the General subtab.
- Select the Vendor Prepayment Account from dropdown list.
- Click Save.
Stand-alone vendor prepayment:
A stand-alone vendor prepayment is not associated with any purchase order. So, you can use the prepayment to any open bills for the respective vendor or save the prepayment amount for future payments.
Consider the below example :
- Request a Goods or Services from your Vendor for the total amount of $ 80,000.
- Your Vendor request an initial deposit of $20,000 to cover the purchase of materials.
- You create a vendor prepayment of $20,000. This amount is credited from your bank account, and debited to your prepayment account.
- Your vendor sends you two bills for this order that you enter on NetSuite:
- Bill A, value $50,000, and dated on February.
- Bill B, value $30,000, and dated on March.
- We can apply the vendor prepayment amount to the open vendor bills manually using Vendor Prepayment Application
- $10,000 applied to Bill A.
- $10,000 applied to Bill B.
This Vendor Prepayment Application decreases the total amount you must pay to your vendor.
- Finally, you can complete the bill payment to your vendor as follows
- $40,000 paid to Bill A ($50,000 total value, minus the $10,000 vendor prepayment application.)
- $20,000 paid to bill B ($30,000 total value, minus the $10,000 vendor prepayment application.)
Entering Vendor Prepayments:
- Go to Transaction tab > Payable > Enter Vendor Prepayment
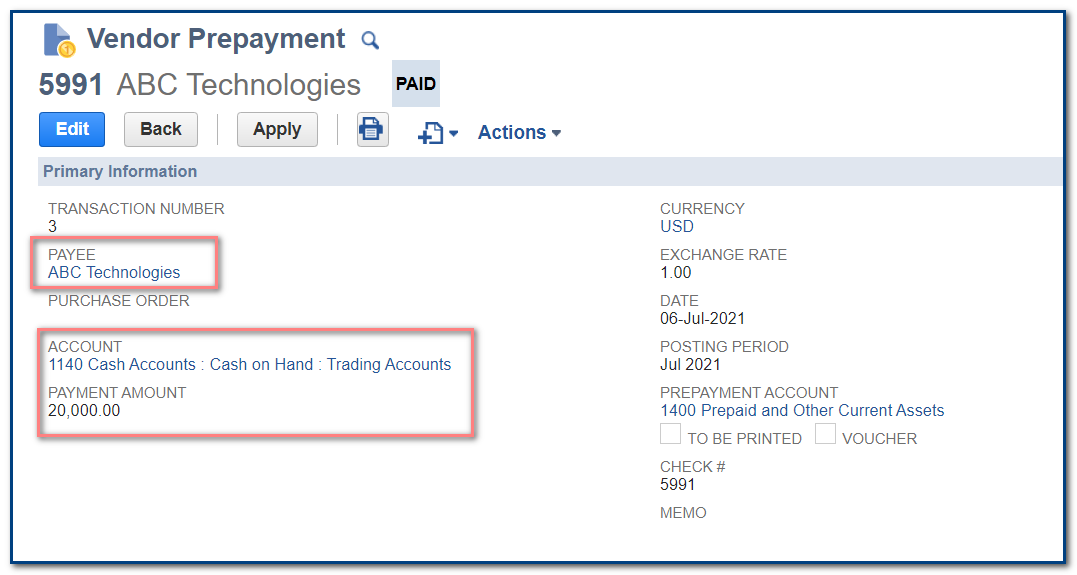
- In Payee field, select the respective vendor from the dropdown list.
- The Currency field autofill’s with the default currency for the vendor. If there is more than one currency for the payee, you can change this value. This field is available when using the Multiple Currencies feature.
- The Exchange Rate depends on the currency selected for the payee. If the currency of the Payee is different from your base currency, the Exchange Rate field shows the corresponding exchange rate value.
- The Prepayment Account field autofill’s with the default prepayment account for the payee, and it cannot be changed from this page.
- Select the respective account payable Account and select a bank account for this payment. The bank account currency must be the same as the transaction currency.
- Enter the Payment Amount for this prepayment
- Save.
- When the prepayment record is saved, the status of the transaction is paid. The bank account is credited, while the prepayment account is debited.
Applying Vendor Prepayments Manually:
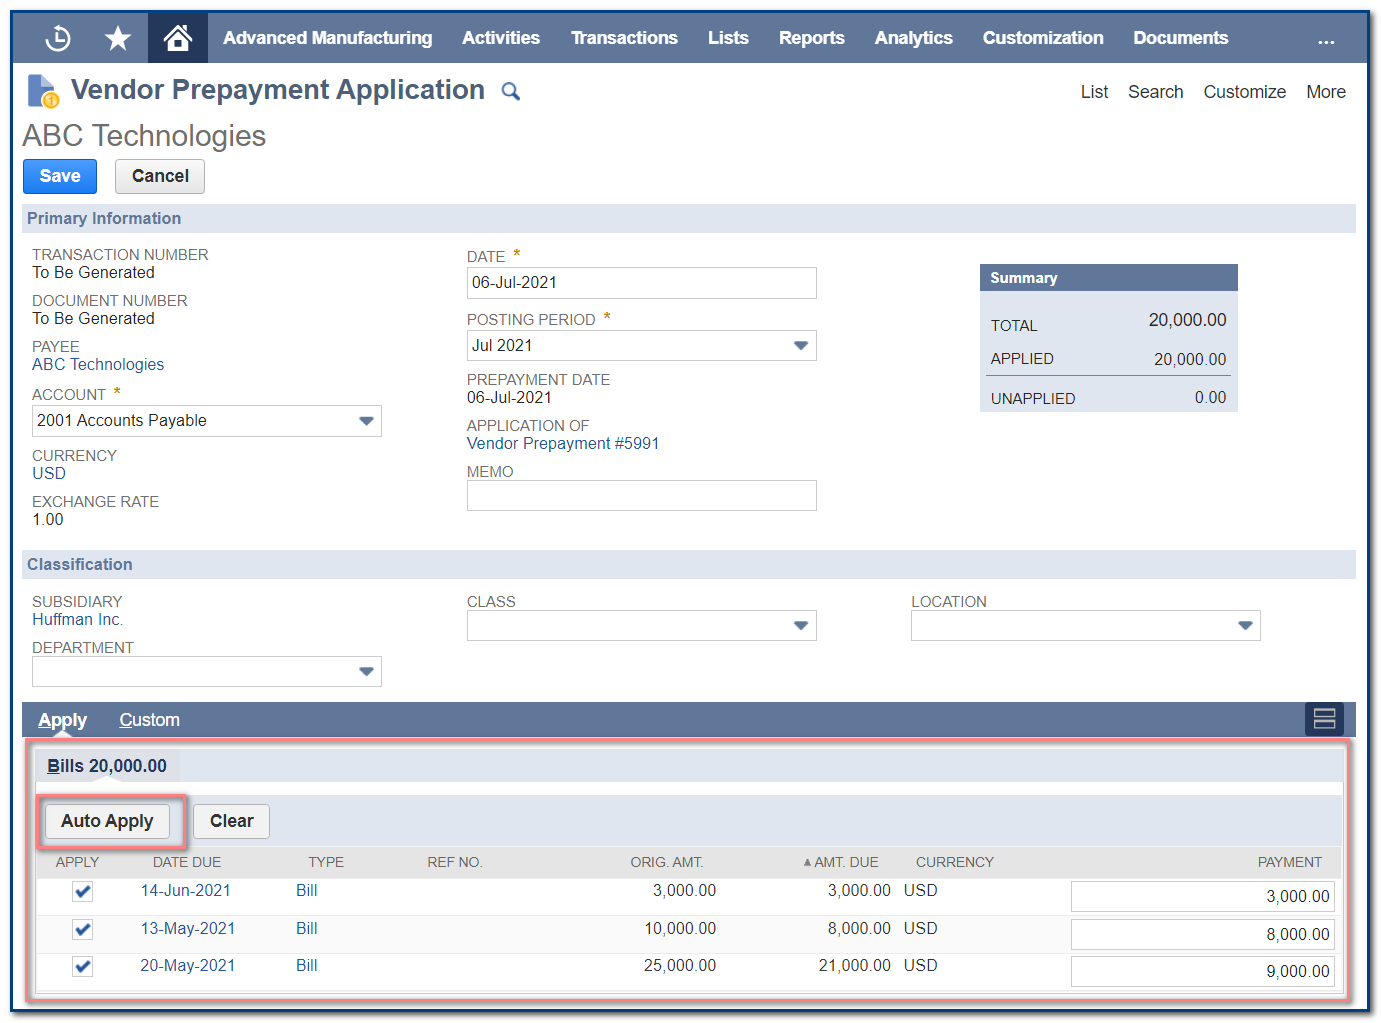
- After save the Vendor prepayment record in view mode Apply button is displayed. While clicking on that button it will navigate to Vendor Prepayment application.
- When applying a vendor prepayment against multiple bills manually, you can choose how the prepayment amount is allocated to each bill.
- In the Bills subtab shows the vendor bills available for application.
- Check the Apply box for the bill where you want to apply the prepayment. For the selected bill, enter the Payment amount for this application.
- You can apply the full prepaid amount in a single application, or multiple applications using the same vendor prepayment.
- You can apply one prepayment to a single bill or to multiple bills, up to the total prepayment amount.
- Alternatively, click Auto Apply to select bills and amounts automatically. Auto Apply applies the prepayment amount on bills up to the total prepayment amount.
A vendor prepayment is a posting transaction it impacts the ledger without offsetting the Accounts Payable account. When the vendor prepayment is applied, the Accounts Payable account is offset.
This is the way to track standalone vendor prepayments in NetSuite.
To Know more about NetSuite Cloud ERP, feel free to reach us on:
Website: https://saturotech.com/
Email ID:sales@saturotech.com
Contact No: +91 844-844-8939 (& Press 3)
You may also be interested in reading this:
How to handle Tax Collection at Source (TCS) in NetSuite
NetSuite for Manufacturing Business Processes